How to Draw From a Plan Into Isometric
Visio Plan 2 Visio Professional person 2021 Visio Standard 2021 Visio Professional 2019 Visio Standard 2019 Visio Professional person 2016 Visio Standard 2016 Visio Professional 2013 Visio 2013 Visio Premium 2010 Visio 2010 Visio Standard 2010 More than...Less
Put data in your drawings and diagrams into perspective with an isometric drawing. Create an isometric drawing from scratch, incorporate basic shapes, or use three-dimensional shapes and templates.
In this commodity:
-
Create an isometric cartoon from scratch
-
Use Basic Shapes in isometric drawings
-
Create an isometric drawing with a template
-
Create an isometric drawing with a Block Diagram With Perspective template
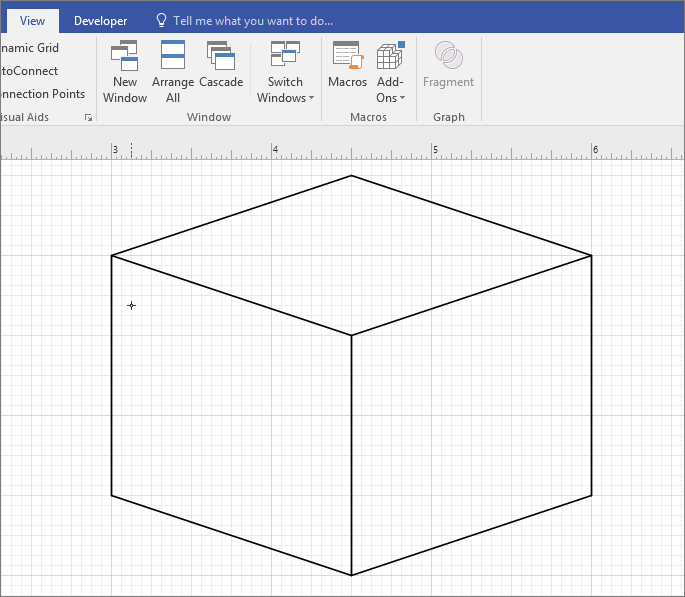
Create an isometric drawing from scratch
-
In Visio, on the File menu, click New, and then click Basic Drawing.
-
Choose between Metric Units or Usa Units, and click Create.
-
Click the View tab, and then click the check box adjacent to Grid in the Show area.
-
Click the Habitation tab, and and so click the arrow next to the Rectangle shape in the Tools area, and select Line.

-
Draw the shape manually using the line tool.
Peak of Page
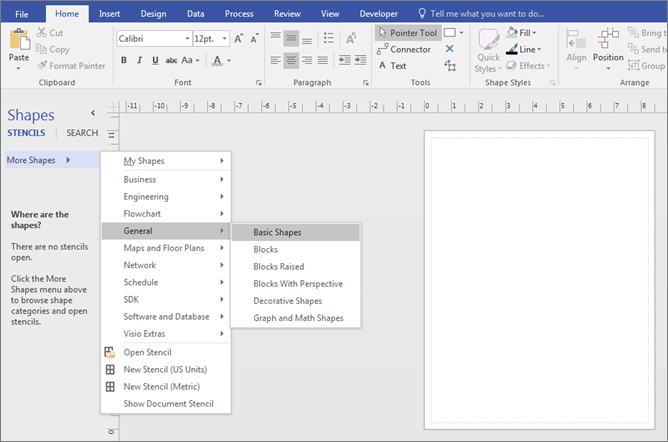
Utilize Basic Shapes in isometric drawings
-
In Visio, on the File menu, click New, and so click Bones Drawing.
-
Choose betwixt Metric Units or United states of america Units, and click Create.
-
Click the View tab, and and then click the check box next to Filigree in the Show area.
-
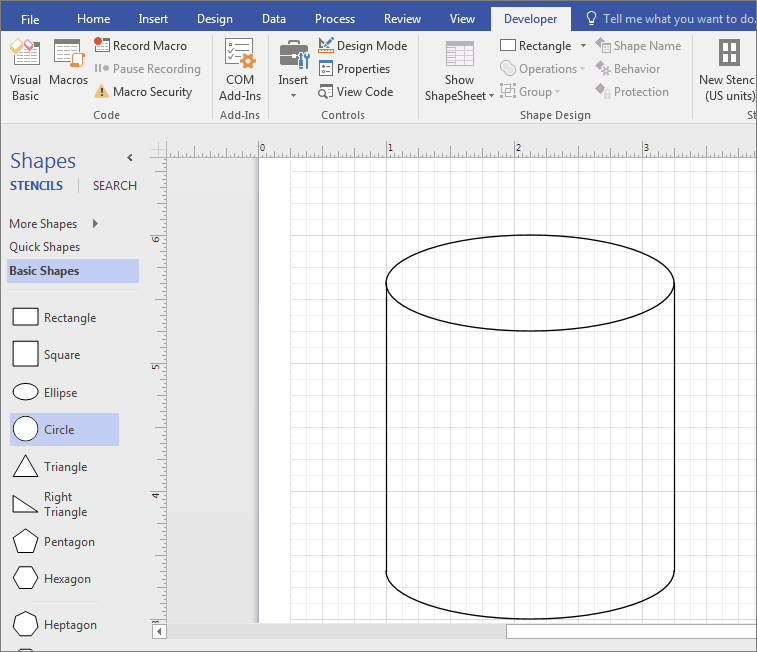
Click the Home tab, and then click More Shapes > General > Bones Shapes.
-
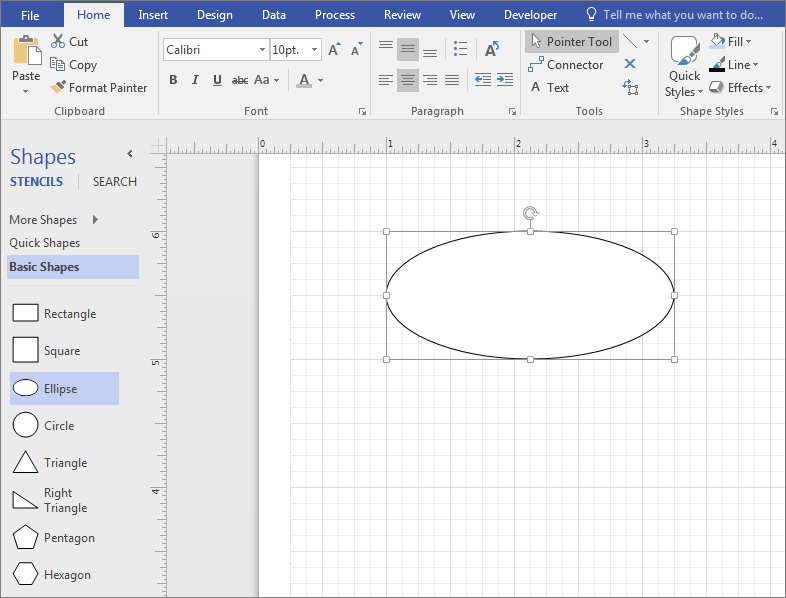
Drag a shape from the Basic Shapes stencil onto the drawing pane.
-
Select the shape, and click the connectedness points to reshape and resize.
Tip:You lot might need an verbal replica of the shape to use elsewhere in the drawing. Press CTRL + C to copy the selected shape, and drag the copied shape to the side of the drawing until y'all are ready to utilize it.
-
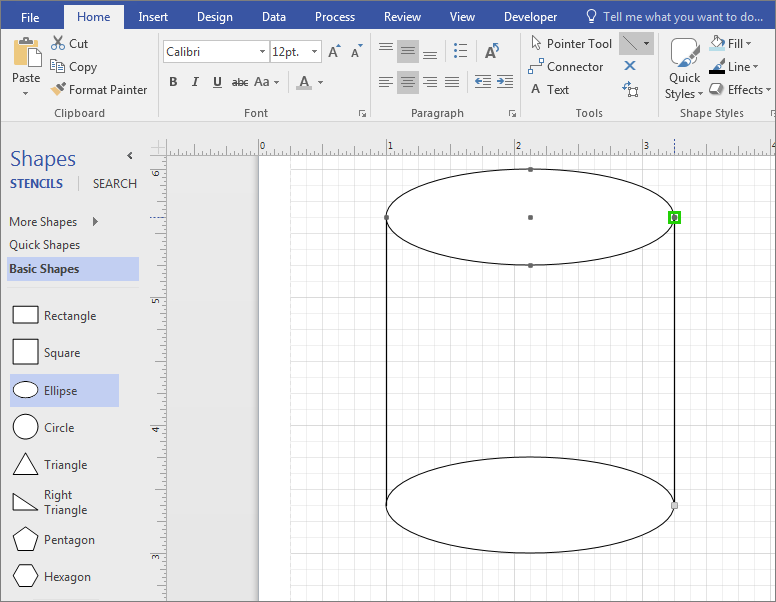
Drag any other shapes that you need to build your drawing from Basic Shapes.
-
On the Home tab, click the arrow side by side to the Rectangle shape in the Tools area, and select Line.
-
Depict lines manually to complete the shape.
-
Click the File tab, then click Options.
-
Click Customize Ribbon.
-
On the Visio Options screen under Main Tabs, click the check box adjacent to Developer.
-
Click OK.
Tip:The Developer tab appears on the Visio ribbon.
-
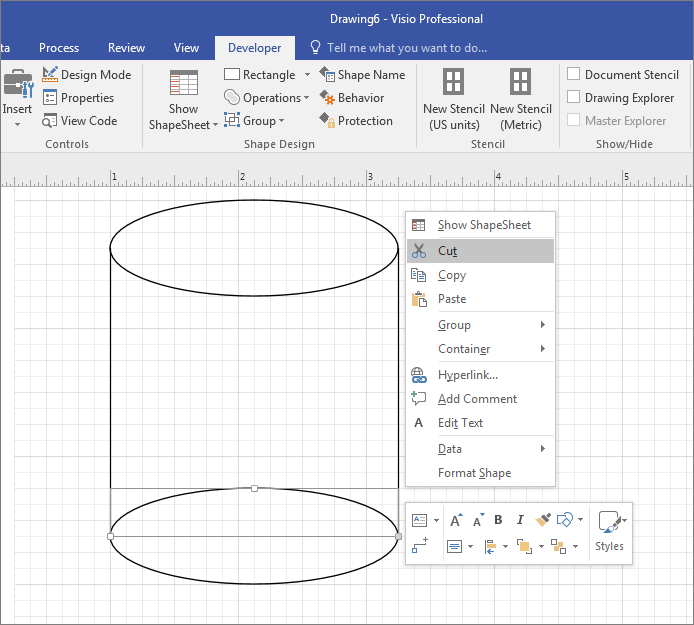
Click the Dwelling tab, click Select in the Editing grouping, and click Select All in the list.
-
Click the Developer tab.
-
In the Shape Design group, click Operations, and then click Trim.
-
Right-click the role of the shape or the line that you desire to remove, and then click Cutting.
-
Repeat Step 17 until the cartoon or diagram is complete.
-
If desired, remove the grid by clicking the View tab, and so click the check box adjacent to Grid in the Evidence expanse.
Top of Folio
Create an isometric drawing with a template
The instructions below employ the Block Diagram With Perspective template. Microsoft Visio has several 3-dimensional templates. To find them, on the File tab, click New, enter "3D" into the search field, and cull the template that all-time fits your needs:
-
Block Diagram
-
Directional Map 3D
-
Block Diagram With Perspective
-
Work Menstruation Diagram – 3D
-
Detailed Network Diagram – 3D
-
Basic Network Diagram – 3D
Top of Page
Create an isometric drawing with a Cake Diagram With Perspective template
(This template is non available in Visio for the web.)
-
In Visio, on the File menu, click New > General, and so click the Block Diagram With Perspective template.
-
Choose between Metric Units or US Units, and click Create.
-
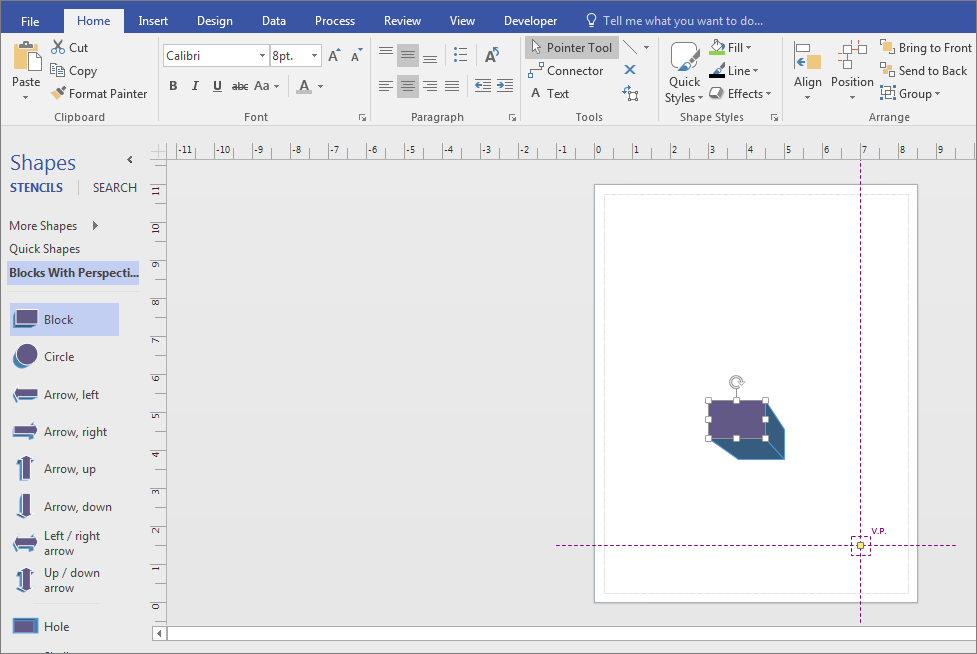
From the Blocks with Perspective stencil, drag a shape onto the cartoon page.
-
Modify the orientation by clicking the control handle
 and dragging the vanishing point (V.P.) to the desired area.
-
Double-click the shape and type to add text.
-
Click the shape, click Fill in the Shape Styles area, and select a color.
Top of Folio
Source: https://support.microsoft.com/en-us/office/isometric-drawings-ca05f985-7958-4b46-b628-b364c5f8a402
0 Response to "How to Draw From a Plan Into Isometric"
Post a Comment